
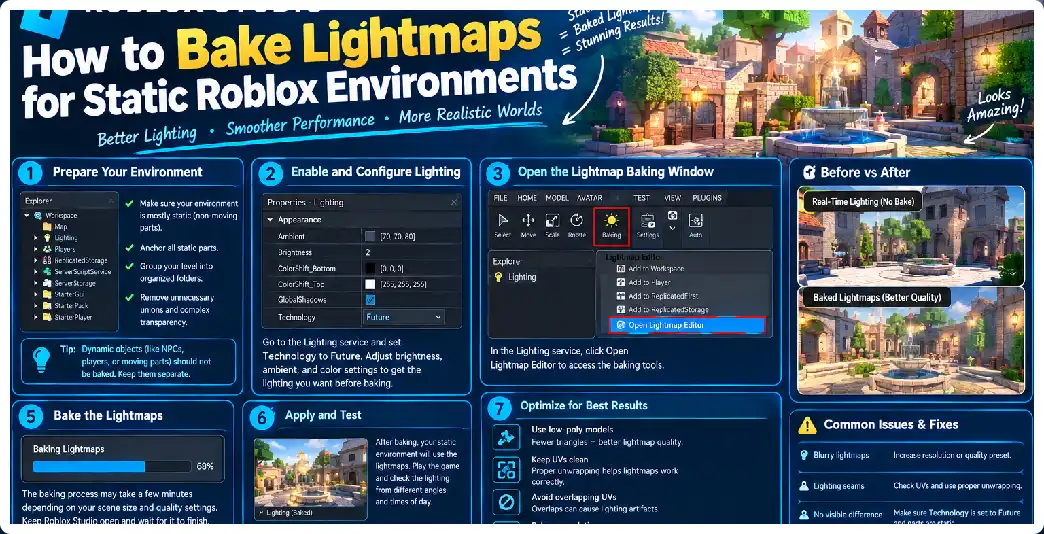
Creating a visually rich static environment in Roblox often involves much more than placing Parts, MeshParts, materials, and lights. When an environment contains buildings, corridors, rooms, underground areas, warehouses, caves, or architectural spaces, realistic indirect illumination can dramatically improve the appearance. Light bouncing from walls, subtle shadowing beneath objects, darker corners, and controlled brightness can make a static environment feel substantially more detailed. However, Roblox’s standard lighting system is fundamentally designed around real-time lighting rather than a traditional offline lightmap-baking pipeline.
That distinction is important before starting a lightmap workflow. In a conventional lightmapping system, an external renderer calculates illumination for static geometry and stores that information in one or more textures. The game engine subsequently samples those textures rather than calculating every part of the lighting from scratch. Offline baking can therefore be useful for environments in which geometry and lighting are largely fixed. Modern rendering tools can bake direct lighting, indirect lighting, ambient occlusion, shadows, and other illumination information into images.
For Roblox, however, you should think of this process as baking static lighting into texture data for a controlled visual result, rather than assuming that Studio has a native button called “Bake Lightmaps.” Roblox officially supports PBR texture maps such as color, normal, roughness, metalness, and emissive, but its documentation does not describe a general-purpose built-in lightmap UV channel and offline lightmap baker for environments.
The most practical workflow is to build or prepare the static environment in a 3D application, establish the final lighting there, unwrap the environment appropriately, bake the desired lighting information into textures, and then import those textures into Roblox. Depending on the desired result, the baked result can be incorporated into the visual texture of a MeshPart or used as part of a carefully controlled PBR workflow. The important point is that this is an art-directed approximation of baked lighting inside Roblox, not a native Roblox lightmap system.
What Is a Lightmap?
A lightmap is a texture containing lighting information calculated ahead of time. Instead of calculating every lighting interaction dynamically, an offline renderer can calculate how light affects static surfaces and store the result in a 2D image. That image is later sampled according to the surface’s UV coordinates. Baking systems commonly support direct lighting, indirect lighting, shadows, ambient occlusion, and other passes.
Imagine a concrete wall inside a room. With entirely dynamic lighting, the engine determines how a light source affects the wall during rendering. With a baked lighting workflow, an offline renderer can calculate the wall’s illumination ahead of time and store the resulting information in a texture. Darker areas can represent shadow, while brighter regions represent stronger illumination.
This technique is especially useful for static environments because the geometry does not need to move. A corridor, museum, hotel interior, dungeon, abandoned building, warehouse, or architectural visualization can often maintain the same geometry and lighting for long periods. That makes precomputed lighting conceptually attractive for those environments.
The biggest limitation is equally important: baked lighting represents a particular lighting state. If you bake a room at noon and later move the sun to midnight, the baked illumination does not automatically recalculate. This is one reason Roblox’s real-time lighting system remains important for dynamic environments. Roblox provides global lighting and local light sources that dynamically illuminate the environment.
Does Roblox Studio Have a Built-In Lightmap Baker?
At present, the safest way to approach Roblox is to distinguish between native real-time lighting and externally baked lighting textures. Roblox Studio provides Lighting, local light objects, PBR materials, SurfaceAppearance, MaterialVariant, post-processing, and other rendering features, but the official environment documentation does not describe a conventional workflow where you select static geometry and have Studio generate a traditional lightmap texture and lightmap UV channel.
This means tutorials claiming that Roblox Studio has a conventional Unity- or Unreal-style “Bake Lightmaps” button should be treated cautiously. Community-created systems have existed that simulate or implement baked lighting through Roblox scripting and other techniques, but those are custom systems rather than the standard Roblox lighting pipeline.
For most creators, the cleaner approach is to perform the actual lighting bake in an external 3D application. A renderer capable of baking lighting can calculate illumination and write it to an image. The resulting image can then be prepared for Roblox. Blender’s baking system, for example, can bake lighting and shading to image textures and explicitly supports workflows intended for lightmaps.
When Should You Use Baked Lighting?
Baked lighting makes the most sense when the environment is relatively static. Good candidates include architectural interiors, horror maps, museums, underground laboratories, abandoned buildings, fixed dungeon rooms, cinematic scenes, exhibition spaces, and static showcase environments.
It becomes less appropriate when your environment changes continuously. If players can move walls, rotate large structures, destroy buildings, change the position of major light sources, or experience a continuously changing day/night cycle, baked illumination can become visually inconsistent. Dynamic lighting is better suited to situations where the lighting state needs to react to gameplay.
A hybrid workflow can sometimes be more useful. You can bake the broad static appearance of an environment while retaining selected real-time lights for important gameplay elements. For example, an architectural interior could have mostly fixed illumination while a flashlight, emergency lamp, or gameplay spotlight remains dynamic. Roblox supports local PointLight, SpotLight, and SurfaceLight sources for these purposes.
Step 1: Build the Environment as Static Geometry
Before baking anything, identify which geometry is actually static. Floors, ceilings, walls, columns, permanent architectural details, large rocks, fixed furniture, and other non-moving structures can be candidates for baked lighting. Moving doors, elevators, characters, vehicles, weapons, and interactive props generally should not have their lighting permanently baked into their appearance.
For Roblox environments, separating static and dynamic elements is especially useful. Keep architectural geometry organized into clear collections or models. A structure might contain a floor mesh, wall meshes, ceiling meshes, pillars, trim, and decorative objects. This organization makes it easier to export the correct geometry for the baking stage and later import the final assets into Studio.
Avoid beginning the bake before the geometry is finalized. Changing the size, position, topology, or UV layout after baking can invalidate the relationship between the baked image and the mesh. Because the baked image is associated with the surface layout, significant geometry or UV changes normally require another bake.
Step 2: Prepare Proper UVs
UV preparation is one of the most important parts of a successful bake. A renderer needs to know where each surface belongs in the target image. Baking systems therefore require suitable UV information and an image target.
For a traditional lightmap, surfaces need a UV layout that gives the baked lighting information a predictable place in the image. Islands should generally be arranged without unwanted overlaps when the target texture is intended to contain unique lighting information for each surface. Overlapping islands can cause different surfaces to share the same baked pixels, which is generally unsuitable when those surfaces receive different lighting.
Leave adequate padding between UV islands. Baking systems use margins around islands to reduce visible discontinuities caused by texture filtering and mipmapping. Without enough padding, dark or bright pixels from one island can bleed into another when the texture is filtered at lower resolutions or viewed at an angle.
For Roblox MeshParts, remember that SurfaceAppearance relies on UV mapping. Roblox specifically describes SurfaceAppearance as a way to apply PBR textures to MeshParts with UV data, while ordinary Parts do not provide the same mesh UV workflow.
Step 3: Decide What You Are Actually Baking
Do not automatically bake the entire final render into your texture. Decide whether you want to bake shadows, indirect illumination, ambient occlusion, direct lighting, or a combination of these.
A lighting bake can contain direct illumination from light sources and indirect illumination produced by light bouncing through the environment. Baking systems can also calculate ambient occlusion and other passes. The exact combination should depend on how much of the final appearance you want to make static.
For a Roblox environment, a useful starting point is a relatively clean baked diffuse-lighting result rather than a photograph-like render. The goal is to retain material identity while adding the desired static illumination. Roblox’s PBR workflow expects the color map to primarily represent surface color rather than baked lighting, so aggressively baking every lighting effect into the color texture can create undesirable behavior under Roblox’s own lighting.
Step 4: Create the Lighting Setup
Before baking, create the lighting conditions that you want the final static environment to represent. Position area lights, point sources, emissive objects, windows, or other illumination sources in the external scene.
The quality of the bake depends heavily on the quality of the lighting setup. If a light is too strong, the bake can contain large overexposed areas. If indirect lighting is too weak, corners may become unnaturally dark. If the environment has insufficient bounce lighting, the result may look flat or excessively contrasty.
Think about the intended Roblox experience while setting up the bake. If the final Roblox environment is a dark horror interior, you may deliberately use strong localized illumination and deep shadow. If it is a brightly lit office or hotel, softer indirect illumination may be more appropriate.
Step 5: Bake the Lighting
In the external renderer, create an image that will receive the baked result. The baking workflow requires a UV map and an image target, and the active image texture or equivalent target receives the baked data.
For a lighting-oriented bake, use a baking mode that includes the desired lighting contributions. A combined bake can include material and lighting information, while dedicated diffuse or shadow baking can isolate different components. Modern baking tools also allow direct and indirect contributions to be controlled independently.
Use sufficient samples for the quality you need. Increasing the quality of the bake generally reduces noise and improves soft-shadow and indirect-light calculations, although higher-quality baking requires more processing time. Baking systems use the renderer’s sampling and bounce settings when calculating the result.
Step 6: Use a Margin Around UV Islands
Do not skip the margin setting. A baked light texture can look perfect at full resolution but develop ugly lines after import if the UV islands have insufficient padding.
Texture filtering and mipmapping can sample neighboring pixels. If one UV island ends with bright pixels and another begins with extremely dark pixels immediately beside it, filtering can create a visible seam. Baking systems therefore generate a margin around islands to help reduce these discontinuities.
The correct margin depends on the texture resolution and the environment. A small architectural prop and a large building shell should not necessarily use identical settings. Test the imported result in Roblox rather than assuming that the bake is correct simply because the image looks good in the external application.
Step 7: Export the Baked Texture
After baking, save the image in a format appropriate for importing into your Roblox project. Roblox supports common image formats for texture workflows, and texture resolution should be selected according to the physical size and visual importance of the asset.
Avoid giving every object an unnecessarily huge texture. Official texture guidance provides smaller resolutions for smaller objects and larger resolutions for larger objects, illustrating the general principle that texture resolution should correspond to the physical and visual scale of the asset.
For a large static building, you might divide the environment into logical sections instead of creating one enormous texture. Separate floors, wings, rooms, or architectural modules can each have their own baked texture. This can make the asset easier to manage and can prevent a single texture from becoming a bottleneck.
Step 8: Import the Mesh Into Roblox
Once the static geometry and texture are prepared, import the mesh into Roblox Studio. MeshParts can use SurfaceAppearance for advanced PBR texture maps. SurfaceAppearance supports ColorMap, NormalMap, RoughnessMap, MetalnessMap, and Emissive-related properties.
The critical consideration is that Roblox does not expose a conventional “lightmap texture slot” in SurfaceAppearance. Therefore, you need to decide how the baked information will participate in the visual pipeline. For a fixed stylized result, creators can incorporate the baked illumination into the visible texture. However, this should be understood as baked shading rather than a separate dynamic lightmap channel.
This distinction prevents a common mistake: expecting Roblox to automatically multiply a separate imported lightmap against the surface while preserving all of its normal dynamic lighting behavior. The standard SurfaceAppearance interface does not document such a dedicated lightmap workflow.
Step 9: Be Careful With Baked Lighting and PBR
Physically based rendering is designed to react to lighting conditions. Roblox’s PBR documentation specifically describes color, normal, roughness, metalness, and emissive maps as inputs that interact with the lighting environment.
This creates an important artistic conflict. If you bake strong shadows directly into your ColorMap and then place the object under strong Roblox lighting, the surface may effectively contain both the baked shadow and the new real-time shadow. The result can look excessively dark or visually inconsistent.
For this reason, a better production approach is often to bake only what you genuinely need. You might use the bake primarily for static ambient shading and artistic detail while keeping Roblox’s real-time lighting relatively controlled.
Step 10: Preserve Normal, Roughness, and Metalness Maps
Do not replace all PBR maps with a single baked image unless you specifically want a stylized or fixed appearance.
Roblox supports separate color, normal, roughness, metalness, and emissive maps. Normal maps influence the surface normal used for lighting, roughness controls how light spreads across the surface, and metalness helps distinguish metallic from non-metallic materials.
For normal maps, Roblox expects tangent-space OpenGL normal maps. A flat normal map corresponds to approximately RGB 127, 127, 255, and incorrectly oriented normal maps can make bumps appear inverted. Imported meshes also need appropriate tangent information for normal mapping to behave correctly.
Roughness deserves particular attention. Low roughness produces sharper, brighter reflections, while high roughness produces a more diffuse, matte response. A baked texture that makes every surface appear dark or glossy can therefore conflict with the intended material properties.
A Practical Static-Building Workflow
A practical production pipeline can look like this:
Model → UV unwrap → create lighting scene → create bake image → bake static illumination → export mesh → export baked texture → import into Roblox → create SurfaceAppearance → test lighting → adjust → publish.
The external scene should represent the lighting state you want to reproduce. The Roblox scene should then be configured so that its own real-time lighting does not dramatically contradict the baked appearance.
For example, imagine a static underground laboratory. You can model the walls, floors, ceiling, pipes, doors, and permanent machinery. Create fixed ceiling lights and colored emergency lights in the external scene. Bake the resulting illumination onto the static architecture. Import the architecture into Roblox, apply the baked visual textures, and retain only selected Roblox lights for interactive elements such as a player’s flashlight.
Should You Bake the Entire Environment Into One Texture?
Usually, no.
A single texture for an entire environment can become difficult to manage and may require a large resolution to maintain acceptable detail. Dividing the environment into logical assets gives you more control over texture resolution and makes future changes easier. Roblox’s texture guidance emphasizes matching resolution to object size and visual requirements rather than automatically using maximum resolution everywhere.
Modular architecture is particularly suitable for this approach. Walls, floors, doors, ceilings, trim pieces, and decorative structures can be separate assets. Roblox’s environment workflows also emphasize modular assets and reusable PBR treatments for architectural environments.
Static Lightmaps Versus Dynamic Roblox Lighting
The central advantage of baking is control. You can create very specific static shadows and indirect illumination in an offline renderer and preserve that artistic appearance.
The central disadvantage is inflexibility. A baked result does not inherently understand that a player has turned on a flashlight, that the sun has moved, or that a door has opened and changed the illumination behind it. Roblox’s Lighting service and local light sources remain better suited to these dynamic situations.
Therefore, the strongest workflow is often hybrid rather than purely baked.
Use baked visual information for architecture that never changes, while using Roblox’s dynamic lighting for gameplay-critical light sources. This gives you control over the overall appearance without eliminating interactive illumination.
Performance Considerations
Baking does not automatically mean that every environment becomes faster. You are exchanging some real-time lighting calculations for additional texture data and potentially more complex assets.
Texture memory matters. Larger textures require more memory, and an environment composed of many large PBR maps can become expensive. Roblox automatically supports different texture quality levels according to available resources, but creators should still avoid unnecessarily large texture assets.
Reuse texture information wherever possible. If several architectural modules can share a material or PBR texture, that can reduce unnecessary duplication. Roblox’s custom material and SurfaceAppearance workflows are designed around reusable visual treatments.
Testing the Bake in Roblox
Never judge a baked environment solely from the external renderer.
Roblox’s final appearance depends on the active lighting environment and the player’s graphics settings. SurfaceAppearance documentation explicitly notes that the appearance of PBR content can depend on device and graphics quality.
Test at several graphics-quality levels. Check dark corners, bright windows, glossy floors, metal surfaces, wall intersections, ceilings, staircases, and areas where several materials meet.
Also test the environment while moving the camera. Some artifacts may not be visible from the original baking camera but become obvious when players explore freely.
Common Lightmap Problems
Black seams
Black seams usually indicate UV or texture bleeding problems. Increase UV island padding and use an appropriate bake margin.
Lighting looks too dark
The baked texture may contain excessive shadowing, while Roblox’s real-time lighting is adding additional darkness. Reduce the amount of lighting information incorporated into the visible texture or adjust the Roblox lighting environment.
Lighting looks too bright
The opposite problem can occur when a brightly baked texture is exposed to strong Roblox lighting. Reduce baked intensity or adjust the real-time lighting.
Texture looks blurry
The texture resolution may be too low for the size of the environment. Roblox’s texture guidance recommends selecting resolution according to object dimensions and visual requirements.
Normal maps look inverted
Verify that the normal map uses the expected OpenGL tangent-space orientation. Roblox specifically warns that incorrect G-channel orientation can invert surface detail.
Glossy surfaces look wrong
Check roughness. Low roughness produces sharper reflections, while high roughness produces a more matte response.
Baked lighting disappears or changes unexpectedly
Remember that a baked texture is not the same as a native dynamic lightmap. Roblox’s active lighting still affects the object. The more baked lighting you put directly into the visible surface texture, the more important it becomes to control the runtime lighting environment.
When a Baked Workflow Is a Bad Idea
Avoid baking if the environment is expected to have constantly changing lighting.
A day/night system is a good example. If the environment transitions from sunrise to noon, then sunset and night, one baked daytime texture cannot accurately represent every lighting state. Roblox’s global lighting system is designed to handle changing environmental illumination.
Likewise, avoid baking the final appearance of objects that players frequently move or manipulate. Dynamic doors, vehicles, characters, movable furniture, weapons, and interactive props are generally better served by real-time lighting.
Recommended Hybrid Architecture
A strong Roblox static environment can use three layers:
Layer 1 — Static geometry: architecture and permanent environmental objects.
Layer 2 — Baked appearance: controlled static illumination, ambient shading, or artistic lighting incorporated into textures.
Layer 3 — Dynamic lighting: flashlights, gameplay lights, moving lights, effects, and other illumination that must react to players.
This architecture separates visual stability from interactive behavior.
FAQ
Can Roblox Studio bake lightmaps automatically?
Roblox Studio’s documented lighting workflow does not currently provide a conventional built-in lightmap-baking system. The practical approach is to bake lighting externally and import the resulting texture-based appearance, or use a custom community-built system.
Can I use Blender to bake Roblox lighting?
You can use an external renderer to bake lighting for assets intended for Roblox. Baking tools can create lighting and shading textures and are explicitly capable of generating lightmap-style results.
Does Roblox have a lightmap slot in SurfaceAppearance?
The documented SurfaceAppearance maps are ColorMap, NormalMap, RoughnessMap, MetalnessMap, and emissive content. There is not a separately documented conventional lightmap slot.
Can I bake shadows into the ColorMap?
Technically, you can create a texture containing baked shading, but it should be treated carefully. Roblox’s PBR guidance recommends keeping albedo primarily as surface color rather than including baked lighting, because lighting is supposed to be handled by the rendering system.
Is baked lighting better than Roblox dynamic lighting?
They solve different problems. Baked lighting provides a fixed appearance for static scenes, while Roblox’s dynamic lighting responds to the active environment and light sources. The appropriate choice depends on whether the scene needs lighting to change.
Can I use baked lighting for a horror game?
Yes. A static horror environment can benefit from carefully controlled baked illumination, especially in rooms, corridors, tunnels, and architectural spaces that do not change. Dynamic lights can then be retained for flashlights or gameplay events.
Can I use baked lighting with PBR textures?
Yes, but you need to understand how the baked information interacts with PBR. Roblox supports separate color, normal, roughness, metalness, and emissive maps, and these respond to lighting. Excessive baked shading can therefore conflict with dynamic illumination.
What texture resolution should I use?
Choose resolution according to the physical size and importance of the asset. General guidance includes 256×256 for smaller objects around 5×5 studs, 512×512 for medium objects around 10×10 studs, and 1024×1024 for larger objects around 20×20 studs, although actual requirements vary by asset and camera distance.
Why are there seams in my baked texture?
UV islands may have insufficient padding, or the baking margin may be too small. Texture filtering can sample pixels from neighboring islands, producing visible lines.
Should moving objects receive baked lighting?
Generally, no. Moving objects need lighting that can respond to their changing position and orientation. Keep baked illumination focused on geometry that is genuinely static.
Can I combine baked lighting with a flashlight?
Yes. This is one of the more useful hybrid approaches. Static architectural shading can be baked while the flashlight remains a Roblox dynamic light source. Roblox provides PointLight, SpotLight, and SurfaceLight for local illumination.
Does baked lighting work on Parts?
Traditional external lightmap baking is most straightforward with custom meshes because they have explicit UV information. Roblox’s SurfaceAppearance workflow is specifically designed around MeshParts with UV data; ordinary Parts do not provide the same UV-based PBR mapping workflow.
What is the biggest mistake to avoid?
The biggest mistake is treating a baked texture as if it were a native Roblox dynamic lightmap. Roblox will still render the object under its lighting system. If you bake very strong shadows into the texture and then use strong runtime lighting, the result can become unnaturally dark or visually inconsistent.
Final Thoughts
Baking static lighting can be a powerful artistic technique for Roblox environments, but it needs to be approached differently from a traditional engine with a dedicated lightmap baker. Roblox’s documented rendering system is centered around dynamic global and local lighting together with PBR materials, while external applications can perform offline baking and generate lighting textures.
For a static environment, the most reliable workflow is to finalize the geometry, prepare suitable UVs, establish the desired lighting externally, bake the required lighting information, import the meshes and textures into Studio, and then carefully balance the baked appearance against Roblox’s real-time lighting. The result can be especially effective for architectural interiors, horror environments, cinematic spaces, museums, underground facilities, and other scenes where lighting is deliberately controlled.
The key is not simply to bake as much lighting as possible. The goal is to bake only the lighting information that benefits the static environment, while allowing Roblox’s real-time lighting to handle everything that needs to remain interactive.