
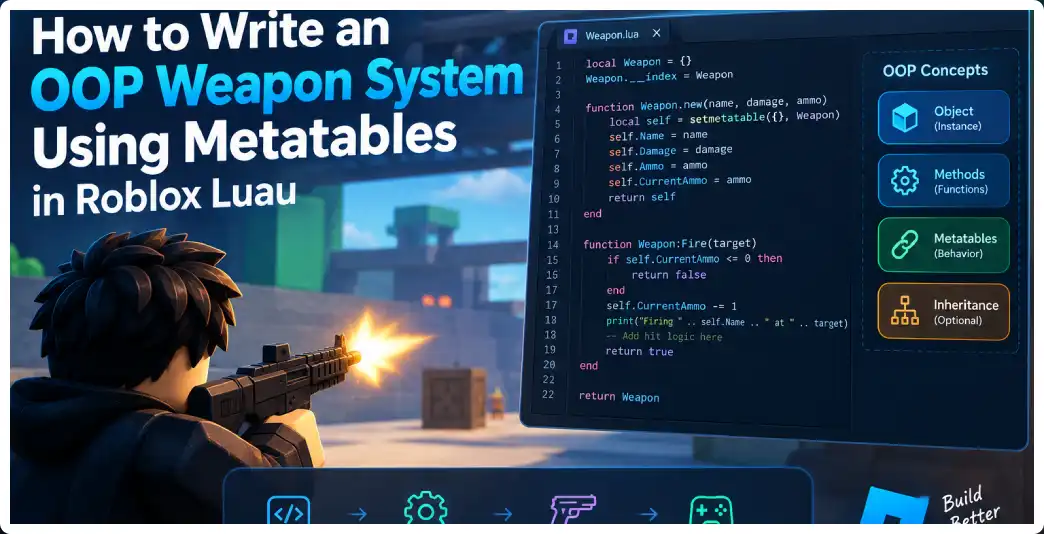
Building a weapon system is one of the best ways to learn object-oriented programming in Luau because weapons naturally behave like objects. A pistol can have ammunition, damage, fire rate, recoil, reload time, and an equipped state. A shotgun can have different values while still exposing many of the same operations. Instead of writing a separate collection of unrelated functions for every weapon, you can create a reusable weapon object and allow individual weapon instances to store their own state.
Luau tables provide the foundation for this approach. Tables can contain values, functions, arrays, dictionaries, and other tables, while metatables provide advanced behavior that can be used to implement object-oriented patterns. The setmetatable() function lets one table use another table for operations such as method lookup.
For a practical weapon system, however, object-oriented structure is only one part of the problem. You also need to decide which code belongs on the client, which code belongs on the server, how a weapon communicates across the network, how hits are detected, how cooldowns are enforced, and how malicious clients are prevented from creating impossible shots. A well-designed system therefore combines metatables with ModuleScript organization, Tool input, RemoteEvent networking, server-side validation, and raycasting.
What Does OOP Mean in a Weapon System?
Object-oriented programming is a way of organizing code around objects that contain state and behavior. In a weapon system, an object can represent one weapon instance.
For example, a rifle object might contain:
NameDamageMagazineSizeAmmoFireRateReloadTimeRangeIsReloadingLastShotTime
The same object can contain methods such as:
Weapon:Fire()Weapon:Reload()Weapon:Equip()Weapon:Unequip()Weapon:CanFire()Weapon:Destroy()
This is useful because the data and operations that manipulate that data remain associated with the same object. ModuleScripts are specifically useful for encapsulating reusable logic, and Roblox’s documentation describes them as a mechanism for sharing and organizing code rather than duplicating it across scripts.
Why Use Metatables?
A simple table can store weapon information:
local weapon = {
    Name = "Pistol",
    Damage = 25,
    Ammo = 12
}
You could also put functions directly inside the table. However, if you create hundreds of weapons, duplicating the same methods inside every table is unnecessary.
A metatable allows multiple weapon objects to use a shared method table.
The fundamental pattern looks like this:
local Weapon = {}
Weapon.__index = Weapon

function Weapon.new(config)
    local self = setmetatable({}, Weapon)

    self.Name = config.Name
    self.Damage = config.Damage
    self.Ammo = config.Ammo

    return self
end

function Weapon:Fire()
    print(self.Name, "fired")
end

return Weapon
When Weapon.new() creates an object, setmetatable() associates that object with Weapon. Setting Weapon.__index = Weapon allows method lookup to fall back to the shared Weapon table. This is one of the standard ways metatables can implement object-like behavior in Luau.
Why ModuleScripts Are Important
A weapon class is an excellent candidate for a ModuleScript because you normally do not want every weapon controller to contain a separate copy of the weapon implementation.
A practical project might look like this:
ReplicatedStorage
└── Shared
    └── WeaponClass

ReplicatedStorage
└── Remotes
    └── WeaponEvent

ServerScriptService
└── WeaponServer

StarterPlayer
└── StarterPlayerScripts
    └── WeaponClient

StarterPack
└── Rifle
    ├── Handle
    └── LocalScript
ModuleScripts return one value, commonly a table containing functions or an object factory. They can be placed in locations appropriate to whether the code is shared, client-side, or server-side.
For security-sensitive weapon logic, you should think carefully before putting it in a replicated location. Code replicated to a client can potentially be inspected by an exploiter, whereas server-only code kept in server containers is not replicated to clients.
The Most Important Architecture Decision
Do not make the client the final authority over weapon damage.
A common beginner implementation looks like this:
Player clicks
     ↓
LocalScript
     ↓
Target detected
     ↓
Target takes damage
This is dangerous for a multiplayer weapon because the client is controlled by the player.
A safer structure is:
Player clicks
     ↓
Client weapon controller
     ↓
RemoteEvent
     ↓
Server validates request
     ↓
Server performs hit detection
     ↓
Server applies damage
RemoteEvents provide asynchronous one-way communication across the client-server boundary. The client can use FireServer(), and the server receives the request through OnServerEvent, which also supplies the Player associated with the request.
The server should therefore decide whether the shot is legitimate.
Creating the Weapon Class
Create a ModuleScript named WeaponClass.
A good starting implementation is:
local Weapon = {}
Weapon.__index = Weapon

function Weapon.new(config)
    local self = setmetatable({}, Weapon)

    self.Name = config.Name or "Weapon"
    self.Damage = config.Damage or 10
    self.MagazineSize = config.MagazineSize or 10
    self.Ammo = config.Ammo or self.MagazineSize
    self.FireRate = config.FireRate or 5
    self.Range = config.Range or 500
    self.ReloadTime = config.ReloadTime or 2

    self.IsReloading = false
    self.LastShotTime = 0

    return self
end

return Weapon
The new() function acts as the constructor. Every call creates a separate table, so two weapon instances can have different ammunition and state while sharing the same methods through the metatable.
For example:
local pistol = Weapon.new({
    Name = "Pistol",
    Damage = 25,
    MagazineSize = 12,
    FireRate = 4,
    Range = 300
})

local rifle = Weapon.new({
    Name = "Rifle",
    Damage = 20,
    MagazineSize = 30,
    FireRate = 10,
    Range = 600
})
Both objects use the same class implementation but maintain independent state.
Adding the Fire Method
A weapon needs a method that changes its internal state.
function Weapon:Fire()
    if self.IsReloading then
        return false
    end

    if self.Ammo <= 0 then
        return false
    end

    self.Ammo -= 1

    return true
end
The colon syntax is important.
This:
function Weapon:Fire()
is shorthand for a function whose first parameter is self.
You can think of:
weapon:Fire()
as equivalent to calling the method with the weapon object supplied as the first argument.
This makes the object-oriented style much easier to read.
Adding a Cooldown
A weapon should not be allowed to fire continuously without respecting its fire rate.
If FireRate is shots per second, the interval can be calculated as:
local interval = 1 / self.FireRate
The class can then use time to determine whether another shot is allowed.
function Weapon:CanFire(now)
    if self.IsReloading then
        return false
    end

    if self.Ammo <= 0 then
        return false
    end

    local interval = 1 / self.FireRate

    if now - self.LastShotTime < interval then
        return false
    end

    return true
end
Then:
function Weapon:Fire(now)
    if not self:CanFire(now) then
        return false
    end

    self.LastShotTime = now
    self.Ammo -= 1

    return true
end
This separation is valuable because CanFire() answers a question while Fire() performs the state change.
Reloading the Weapon
Reloading can be represented by another method:
function Weapon:Reload()
    if self.IsReloading then
        return false
    end

    if self.Ammo >= self.MagazineSize then
        return false
    end

    self.IsReloading = true

    task.delay(self.ReloadTime, function()
        self.Ammo = self.MagazineSize
        self.IsReloading = false
    end)

    return true
end
For a beginner project this works, but a production multiplayer system should be more careful about asynchronous state and destruction. If the weapon is removed while the reload is running, the delayed callback may need additional protection.
A more robust implementation can use a reload token:
function Weapon:Reload()
    if self.IsReloading then
        return false
    end

    if self.Ammo >= self.MagazineSize then
        return false
    end

    self.IsReloading = true
    local reloadId = self.ReloadId + 1
    self.ReloadId = reloadId

    task.delay(self.ReloadTime, function()
        if self.Destroyed then
            return
        end

        if self.ReloadId ~= reloadId then
            return
        end

        self.Ammo = self.MagazineSize
        self.IsReloading = false
    end)

    return true
end
The exact implementation depends on how complex your weapon lifecycle becomes.
Adding Raycasting
A firearm normally needs to determine what is in the path of a shot.
The world API provides raycasting through Workspace:Raycast(). The operation takes an origin, direction, and optional RaycastParams, returning a raycast result when something is hit.
A server-side shot can look like this:
local function performRaycast(origin, direction, character)
    local params = RaycastParams.new()

    params.FilterType = Enum.RaycastFilterType.Exclude
    params.FilterDescendantsInstances = {character}

    return workspace:Raycast(origin, direction, params)
end
The character is excluded so the shooter does not immediately hit their own body.
The direction should be multiplied by the desired range:
local direction = aimDirection.Unit * weapon.Range
Using .Unit normalizes the vector so its length does not affect the direction.
Building the Server Weapon Controller
Create a RemoteEvent in ReplicatedStorage named:
WeaponEvent
The client can send a firing request:
WeaponEvent:FireServer(origin, direction)
The server receives:
WeaponEvent.OnServerEvent:Connect(function(player, origin, direction)
    -- validate request
end)
The server should never blindly trust the arguments. Client-supplied values must be validated before they affect game state. Server validation should include contextual checks, permissions, state, distance, rate limits, and other rules appropriate to the action.
A Basic Server Weapon Object
A server weapon manager could create weapon objects like this:
local ReplicatedStorage = game:GetService("ReplicatedStorage")

local Weapon = require(
    ReplicatedStorage.Shared.WeaponClass
)

local weapon = Weapon.new({
    Name = "Rifle",
    Damage = 20,
    MagazineSize = 30,
    FireRate = 10,
    Range = 600
})
However, in a multiplayer game you normally need weapon state associated with each player rather than one global weapon object.
A simple structure is:
local weaponsByPlayer = {}

weaponsByPlayer[player] = Weapon.new({
    Name = "Rifle",
    Damage = 20,
    MagazineSize = 30,
    FireRate = 10,
    Range = 600
})
This is one of the main benefits of object-oriented design: the weapon class remains reusable while the manager decides which player owns which instance.
Validating the Player
The server should first verify that the player actually has a character and that the character is alive.
local character = player.Character

if not character then
    return
end

local humanoid = character:FindFirstChildOfClass("Humanoid")

if not humanoid or humanoid.Health <= 0 then
    return
end
You should also verify that the requested weapon corresponds to an actual weapon the player possesses.
Never allow a client to simply send:
"RocketLauncher"
and have the server instantiate an arbitrary weapon.
The server should maintain its own authoritative weapon inventory.
Validating the Origin
A malicious client might attempt to send a firing origin hundreds of studs away from its character.
A basic validation might compare the requested origin with a server-known character position:
local root = character:FindFirstChild("HumanoidRootPart")

if not root then
    return
end

if (origin - root.Position).Magnitude > 10 then
    return
end
The exact tolerance depends on your game.
The important concept is that the client can request an action, but the server decides whether that request is plausible.
Validating the Direction
You should also normalize and sanity-check the direction:
if direction.Magnitude < 0.001 then
    return
end

direction = direction.Unit
The server can then construct its own ray using the validated origin and direction.
Server-Side Damage
Suppose the raycast hits a part:
local result = workspace:Raycast(
    origin,
    direction * weapon.Range,
    params
)

if result then
    local hitPart = result.Instance
    local model = hitPart:FindFirstAncestorOfClass("Model")

    if model then
        local humanoid = model:FindFirstChildOfClass("Humanoid")

        if humanoid then
            humanoid:TakeDamage(weapon.Damage)
        end
    end
end
This keeps the actual damage decision on the server.
The client can display a muzzle flash immediately, play recoil, and update crosshair effects, but the authoritative health change should happen through server-controlled logic.
Why Client-Side Weapon Effects Still Matter
Server authority does not mean the client should wait for every visual effect.
If the player clicks and the game waits for a server response before playing a muzzle flash, the weapon may feel sluggish.
A better architecture is:
CLIENT
Input
 ↓
Local prediction
 ↓
Muzzle flash
 ↓
Recoil
 ↓
Sound
 ↓
RemoteEvent
 ↓
SERVER

SERVER
Validate
 ↓
Check cooldown
 ↓
Check ammunition
 ↓
Raycast
 ↓
Apply damage
 ↓
Replicate authoritative result
This gives responsive feedback while maintaining server authority.
Roblox’s tool documentation specifically describes the division between client-side input and server-side effects for tools, with RemoteEvents commonly used to connect the two sides.
Creating Weapon Subclasses
Once the base weapon works, metatables become especially useful.
Imagine a base class:
local Weapon = {}
Weapon.__index = Weapon
A rifle could inherit from it:
local Rifle = setmetatable({}, Weapon)
Rifle.__index = Rifle
Then:
function Rifle.new(config)
    local self = setmetatable(
        Weapon.new(config),
        Rifle
    )

    self.BurstSize = config.BurstSize or 3

    return self
end
You can override behavior:
function Rifle:Fire(now)
    if not self:CanFire(now) then
        return false
    end

    self.LastShotTime = now
    self.Ammo -= 1

    return true
end
The exact inheritance architecture should be kept simple. Not every weapon needs a separate subclass. Sometimes configuration is enough.
Composition Versus Inheritance
A common mistake is creating enormous inheritance trees:
Weapon
 ├── Gun
 │    ├── Rifle
 │    │    ├── AssaultRifle
 │    │    └── BurstRifle
 │    └── Shotgun
 └── ExplosiveWeapon
This can become difficult to maintain.
An alternative is composition.
A weapon can contain separate systems:
Weapon
 ├── AmmoComponent
 ├── FireController
 ├── DamageController
 ├── RecoilController
 ├── ReloadController
 └── EffectsController
Metatables are still useful for the primary weapon object, but specialized behavior can remain separate.
This is often easier to scale when your game eventually has dozens of weapon types.
Using Configuration Tables
Instead of hardcoding every weapon:
local WeaponDefinitions = {
    Pistol = {
        Damage = 25,
        MagazineSize = 12,
        FireRate = 4,
        Range = 300,
        ReloadTime = 1.5,
    },

    Rifle = {
        Damage = 20,
        MagazineSize = 30,
        FireRate = 10,
        Range = 600,
        ReloadTime = 2.2,
    },

    Shotgun = {
        Damage = 12,
        MagazineSize = 8,
        FireRate = 1.2,
        Range = 150,
        ReloadTime = 2.8,
    },
}
You can create the appropriate object from a definition.
This separates weapon data from weapon behavior.
That distinction becomes increasingly important as a project grows.
A Better Constructor
A production-oriented constructor can validate configuration:
function Weapon.new(config)
    assert(config, "Weapon configuration is required")

    local self = setmetatable({}, Weapon)

    self.Name = assert(config.Name, "Weapon name required")
    self.Damage = assert(config.Damage, "Weapon damage required")
    self.MagazineSize = assert(config.MagazineSize, "Magazine size required")
    self.FireRate = assert(config.FireRate, "Fire rate required")
    self.Range = assert(config.Range, "Weapon range required")
    self.ReloadTime = assert(config.ReloadTime, "Reload time required")

    self.Ammo = self.MagazineSize
    self.LastShotTime = -math.huge
    self.IsReloading = false
    self.Destroyed = false

    return self
end
Configuration validation helps catch errors early instead of allowing a malformed weapon to fail much later during combat.
Adding Strict Luau Types
For larger systems, Luau’s optional static type checking can make weapon code easier to maintain. Luau is dynamically typed by default but supports explicit types and strict type checking.
A configuration type might look like:
export type WeaponConfig = {
    Name: string,
    Damage: number,
    MagazineSize: number,
    FireRate: number,
    Range: number,
    ReloadTime: number,
}
You can then annotate:
function Weapon.new(config: WeaponConfig)
This makes configuration mistakes easier to detect while editing.
Handling Weapon Destruction
Objects should have a lifecycle.
function Weapon:Destroy()
    self.Destroyed = true
    self.IsReloading = false
end
Methods can then check:
if self.Destroyed then
    return false
end
If your object owns connections, effects, or resources, the Destroy() method should disconnect and clean them up.
This becomes especially important when weapons are repeatedly equipped and unequipped.
Connecting the Tool
The Tool object provides events such as Equipped, Unequipped, Activated, and Deactivated. Input events for tools occur on the client, which is why a practical weapon often uses a LocalScript for input and a server-side Script for authoritative behavior.
A simple LocalScript can do:
local tool = script.Parent

tool.Activated:Connect(function()
    print("Fire requested")
end)
You can then call the weapon controller.
Automatic Weapons
For automatic weapons, do not simply fire as quickly as the frame rate allows.
Instead, control the fire interval.
A client loop might use:
local firing = false

tool.Activated:Connect(function()
    firing = true
end)

tool.Deactivated:Connect(function()
    firing = false
end)
Then the controller can repeatedly request shots at the configured rate.
The server should independently enforce the same or stricter rate. Client cooldowns are for responsiveness; server cooldowns are for authority.
Reload Requests
The client can send a reload request:
WeaponEvent:FireServer("Reload")
The server then checks:
if weapon then
    weapon:Reload()
end
But the server should not blindly trust that every request is valid.
A player who is dead, stunned, unequipped, or otherwise unable to reload may need to be rejected depending on the rules of the game.
Rate Limiting RemoteEvents
RemoteEvents are network messages, not security boundaries.
The documentation recommends validating remote inputs and applying rate limits where appropriate. RemoteEvents also have request limits, making unnecessary high-frequency communication undesirable.
For a weapon, a server-side cooldown is one of the most important protections.
The server can use:
local now = os.clock()

if now - weapon.LastShotTime < 1 / weapon.FireRate then
    return
end
The server should then update the timestamp only after the request passes validation.
Headshots and Damage Multipliers
You can extend the server’s hit processing:
local multiplier = 1

if hitPart.Name == "Head" then
    multiplier = 2
end

local damage = weapon.Damage * multiplier
humanoid:TakeDamage(damage)
For a more flexible system, define hit multipliers in configuration:
local multipliers = {
    Head = 2,
    UpperTorso = 1,
    LowerTorso = 1,
}
The server should own these values.
Teams and Friendly Fire
Before applying damage, check whether the target is allowed to be damaged.
Your game might use teams:
if targetPlayer and targetPlayer.Team == player.Team then
    return
end
The exact rule depends on your game design.
The important point is that combat rules belong to authoritative game logic rather than being trusted to a client.
Debugging the Weapon Class
Useful debug information includes:
print(
    weapon.Name,
    weapon.Ammo,
    weapon.IsReloading,
    weapon.LastShotTime
)
For raycasts, temporary visual debugging can help determine whether the direction is correct.
Common problems include:
- Wrong ray origin
- Incorrect direction
- Character not excluded
- Weapon range too short
- Client and server using different weapon configurations
- Cooldown being calculated differently
- Weapon object being recreated unexpectedly
Common Mistakes
Mistake 1: One giant script
Putting input, animation, raycasting, damage, ammo, effects, UI, and networking into one script makes maintenance difficult.
Separate responsibilities.
Mistake 2: Client-controlled damage
Never let the client simply send:
FireServer(targetHumanoid)
and immediately trust it.
The server should verify the action.
Mistake 3: No server cooldown
A client can call the remote repeatedly regardless of what its local cooldown says.
The server must enforce rate limits.
Mistake 4: Replicating sensitive server code
Server-only code should remain server-side when possible. Code replicated to clients can potentially be inspected.
Mistake 5: Overusing inheritance
If every weapon requires another subclass, the system may become harder to understand.
Use configuration and composition when appropriate.
Recommended Final Architecture
A scalable weapon system can look like:
ReplicatedStorage
│
├── Shared
│   ├── WeaponClass
│   └── WeaponDefinitions
│
└── Remotes
    └── WeaponEvent

ServerScriptService
│
├── WeaponService
└── CombatService

StarterPlayer
└── StarterPlayerScripts
    └── WeaponController

StarterPack
├── Pistol
├── Rifle
└── Shotgun
The responsibilities are:
WeaponClass
Stores object state and weapon behavior.
WeaponDefinitions
Stores configurable weapon statistics.
WeaponController
Reads player input and handles client-side responsiveness.
WeaponService
Creates and manages authoritative weapon objects.
CombatService
Performs server-side hit validation and damage.
WeaponEvent
Communicates requests between client and server.
This separation follows the general client/server and reusable-module architecture recommended for Roblox development.
When Should You Use Metatables?
Metatables are particularly useful when:
- You have many weapon instances.
- Weapons share common behavior.
- Individual weapons maintain independent state.
- You want reusable methods.
- You want a class-like API.
- You expect subclasses or specialized weapon behavior.
They are less useful when your entire game has only one very simple weapon.
The goal is not to use OOP because it sounds advanced. The goal is to use it because the game’s complexity benefits from objects.
Frequently Asked Questions
Can I make a weapon class without metatables?
Yes. Luau tables and functions are sufficient for simple systems. Metatables become useful when you want shared methods and class-like behavior across many instances.
What does __index do?
__index controls how a missing key can be resolved through the metatable. Setting:
Weapon.__index = Weapon
is the common pattern used to allow instances to access methods stored on the class table.
What does setmetatable() do?
It associates a table with a metatable, allowing special behavior such as __index lookup. Luau provides setmetatable() and getmetatable() for this purpose.
Should weapon damage run on the client?
For a competitive multiplayer weapon, authoritative damage should be handled by the server. The client can request the shot and provide information needed for the server to evaluate it, but the server should validate the request before changing game state.
Should the client perform raycasting?
It can perform raycasts for responsive effects or prediction, but authoritative hit validation should remain server-side for important combat outcomes. A server-side raycast can independently determine whether a reported shot is valid.
Should every weapon have its own ModuleScript?
Not necessarily. A shared weapon class plus configuration tables is usually easier to maintain when many weapons share the same fundamental behavior.
Can one weapon class create multiple guns?
Yes. That is one of the main advantages of the pattern:
local pistol = Weapon.new(pistolConfig)
local rifle = Weapon.new(rifleConfig)
local shotgun = Weapon.new(shotgunConfig)
Each object can have independent state while sharing the same implementation.
Should I use inheritance for every weapon?
No. Use inheritance when a weapon genuinely has specialized behavior. Use configuration for differences such as damage, ammunition, range, and fire rate.
Why use a RemoteEvent instead of directly changing the server?
The client and server run in separate execution contexts. A RemoteEvent provides the communication mechanism for a client request to reach server code.
Where should shared ModuleScripts go?
A shared ModuleScript can be placed somewhere both sides can access, commonly ReplicatedStorage. Server-only modules should remain in server-only locations when they contain sensitive logic.
Can an exploiter change a client-side weapon class?
Anything replicated to the client should be treated as potentially inspectable or manipulable. Therefore, sensitive weapon rules should not depend exclusively on replicated client code.
How do I support different fire modes?
Add a property such as:
self.FireMode = config.FireMode
and implement separate behaviors for "Semi", "Auto", and "Burst".
How do I add recoil?
Keep recoil as client-side presentation while the server validates the shot. Recoil can modify the player’s camera, weapon model, or crosshair without becoming the authority for damage.
How do I add reload animations?
The client can start the animation immediately after a reload request while the server tracks the authoritative reload state. When timing matters, the server should determine when ammunition actually becomes available.
Is an OOP weapon system necessary for a small game?
No. For one or two simple weapons, a procedural approach can be perfectly reasonable. OOP becomes more valuable as weapon count and behavior complexity increase.
Conclusion
An OOP weapon system using metatables gives you a reusable foundation for building pistols, rifles, shotguns, melee weapons, launchers, and other combat objects without duplicating the same logic repeatedly.
The core pattern is simple:
local Weapon = {}
Weapon.__index = Weapon

function Weapon.new(config)
    local self = setmetatable({}, Weapon)

    self.Damage = config.Damage
    self.Ammo = config.MagazineSize

    return self
end

function Weapon:Fire()
    -- weapon behavior
end

return Weapon
The difficult part is not creating the metatable. The difficult part is designing the complete multiplayer architecture around it.
A strong production system separates weapon configuration, weapon objects, client input, visual feedback, networking, server validation, raycasting, ammunition, cooldowns, and damage. ModuleScripts help encapsulate reusable behavior, RemoteEvents provide client-server communication, and server-side validation protects important game state.
Once this foundation is working, you can extend the same architecture with attachments, recoil, animations, magazines, reload cancellation, projectile weapons, hit markers, damage falloff, critical hits, weapon switching, ammunition reserves, abilities, and different fire modes without turning the entire project into one enormous script.
The objective of OOP is therefore not merely to make the code look sophisticated. It is to make a growing weapon system easier to understand, reuse, test, extend, and maintain.