
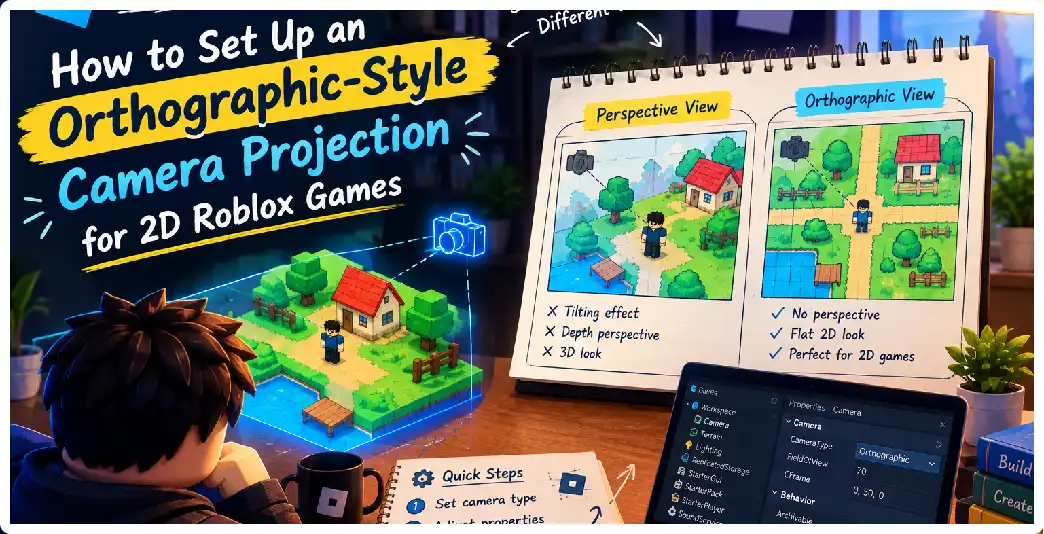
If you are building a 2D game in Roblox Studio, one of the first systems you should plan carefully is the camera. A conventional Roblox camera is designed for 3D experiences where players can rotate, zoom, orbit, and explore the environment. A 2D game usually requires much more control.
You may want the camera to remain perfectly horizontal, follow the player along only one axis, stay above the game board, maintain a consistent viewing angle, or keep the world framed like a traditional 2D game.
This is where the idea of an orthographic camera becomes important.
An orthographic projection removes the normal perspective relationship between distance and apparent object size. A perspective camera makes distant objects appear smaller, while an orthographic camera can maintain consistent apparent size regardless of depth.
However, there is an important Roblox-specific limitation: the standard Roblox Camera API currently does not expose a native orthographic projection mode. The current Camera class documents properties such as CFrame, CameraType, FieldOfView, FieldOfViewMode, Focus, and ViewportSize, but there is no standard Orthographic camera mode or OrthographicSize property.
The solution is to create an orthographic-style camera system.
This article explains exactly how that works and how you can use the approach to build side-scrolling, top-down, and isometric-style Roblox games.
What Is Orthographic Projection?
Orthographic projection is a method of displaying a three-dimensional environment without conventional perspective scaling.
In a perspective camera:
Near object = larger
Far object  = smaller
In an orthographic camera:
Near object = same apparent scale
Far object  = same apparent scale
This makes orthographic projection useful for games where the player should perceive the environment more like a flat board or illustration.
It is common in styles such as:
- 2D platformers
- Tactical games
- Strategy games
- Puzzle games
- Isometric games
- Board games
- Map-based games
- Arcade games
Why Use an Orthographic-Style Camera in Roblox?
Even though Roblox’s standard camera does not provide native orthographic projection, controlling the camera carefully can produce a strong 2D presentation.
You can eliminate most of the camera behavior that players expect from a normal Roblox game.
Instead of allowing:
- Free camera rotation
- Zooming
- Orbiting
- Character-centered perspective movement
you can define:
- Fixed camera direction
- Fixed camera distance
- Controlled tracking
- Camera boundaries
- Fixed gameplay depth
- Custom zoom
This is enough for many 2D-style games.
Important Roblox Camera Limitation
Before implementing anything, remember this:
Scriptable does not mean orthographic.
Setting:
camera.CameraType = Enum.CameraType.Scriptable
does not switch the renderer to orthographic projection.
It simply gives your script control over the camera. The documented Camera behavior confirms that Scriptable prevents the default camera scripts from updating the camera automatically.
That distinction should be part of your design from the beginning.
Setting Up the Camera Script
Create a LocalScript inside:
StarterPlayer
└── StarterPlayerScripts
Name it:
CameraController
Then use:
local camera = workspace.CurrentCamera

camera.CameraType = Enum.CameraType.Scriptable
This gives the LocalScript control over the player’s camera.
Positioning the Camera
Suppose the game is a side-scrolling platformer.
You could place the camera at:
local cameraPosition = Vector3.new(
    0,
    15,
    100
)
Then make it look toward:
local targetPosition = Vector3.new(
    0,
    10,
    0
)
Use:
camera.CFrame = CFrame.lookAt(
    cameraPosition,
    targetPosition
)
CFrame.lookAt() is designed to create an orientation from a position toward a target point.
Setting Camera Focus
Set:
camera.Focus = CFrame.new(targetPosition)
The Focus property tells Roblox which region of the world should receive priority for certain graphical processing. When a camera is Scriptable, the default scripts no longer update Focus automatically, so your camera controller should update it as appropriate.
Creating a Simple 2D Side-Scroller
A simple side-scrolling controller might use:
local Players = game:GetService("Players")
local RunService = game:GetService("RunService")

local player = Players.LocalPlayer
local camera = workspace.CurrentCamera

camera.CameraType = Enum.CameraType.Scriptable

RunService:BindToRenderStep(
    "Camera2D",
    Enum.RenderPriority.Camera.Value,
    function()
        local character = player.Character

        if not character then
            return
        end

        local root = character:FindFirstChild("HumanoidRootPart")

        if not root then
            return
        end

        local x = root.Position.X

        local cameraPosition = Vector3.new(
            x,
            12,
            100
        )

        local targetPosition = Vector3.new(
            x,
            12,
            0
        )

        camera.CFrame = CFrame.lookAt(
            cameraPosition,
            targetPosition
        )

        camera.Focus = CFrame.new(targetPosition)
    end
)
This is a basic foundation for a side-scrolling Roblox game.
How the Camera Works
The important part is:
local x = root.Position.X
The camera follows the player’s X coordinate.
The camera’s Z position remains constant.
Therefore, the player can move through the level horizontally while the camera maintains the same depth.
Locking the Camera Orientation
Do not let the player rotate the camera.
The camera should always look toward the same gameplay plane.
This creates a predictable 2D presentation.
If the player can rotate the camera freely, the experience immediately starts behaving like a 3D game.
Locking Player Depth
Camera control alone is not enough.
If the player can freely move through the depth axis, they can move closer to or farther away from the camera.
Because the Roblox renderer remains perspective-based, this can change their apparent size.
A 2D controller should therefore normally restrict depth movement.
For example, the player’s gameplay position might use:
X = movement
Y = jumping
Z = fixed
This is one of the most important design principles for a 2D Roblox game.
Using a Narrow Field of View
You can make the perspective effect less noticeable by reducing the field of view.
For example:
camera.FieldOfView = 20
The exact value is a design decision.
The documented FieldOfView property controls the vertical field of view, with horizontal coverage related to the screen aspect ratio.
A narrower FOV generally creates a flatter visual impression.
But it does not create true orthographic projection.
Why FieldOfView Is Important
Suppose your camera is extremely close to the player with a wide FOV.
Perspective will be more obvious.
Move the camera farther away and reduce the FOV, and the world can appear visually flatter.
This can be particularly effective when combined with a fixed gameplay plane.
Choosing Camera Distance
There is no universal camera distance.
The appropriate distance depends on:
- Level size
- Player size
- Desired visible area
- Camera FOV
- Device aspect ratio
- Art style
Start with a distance that frames the player and nearby gameplay.
Then test the camera on multiple displays.
Creating Camera Bounds
Never assume the player will always remain near the center of the level.
If the level ends, the camera should stop.
Use:
local minX = -200
local maxX = 200

local cameraX = math.clamp(
    root.Position.X,
    minX,
    maxX
)
Now the camera remains within the intended level boundaries.
Why Camera Bounds Improve 2D Games
Camera bounds prevent:
- Empty space
- Unfinished areas
- Hidden development geometry
- Level edges
- Unintended scenery
They also make the level feel more polished.
Camera Dead Zones
A dead zone keeps the player near the center without constantly moving the camera.
For example:
Left edge |---- Safe Zone ----| Right edge
The player can move inside the safe zone.
When the player approaches an edge, the camera starts following.
This is common in polished side-scrolling camera systems.
Smooth Camera Movement
Use interpolation rather than immediately moving the camera to its target.
Roblox’s CFrame data type supports Lerp().
For example:
camera.CFrame = camera.CFrame:Lerp(
    targetCFrame,
    0.1
)
This creates a gradual transition.
Camera Smoothing for Platformers
Platformers require special attention.
Too little smoothing can make the camera appear rigid.
Too much smoothing can cause the camera to lag behind the player.
The correct balance depends on:
- Player speed
- Jump height
- Level design
- Camera distance
- Game style
Fast platformers generally benefit from responsive camera movement.
Vertical Camera Control
A platformer may require vertical tracking.
You can track the player’s Y coordinate, but don’t necessarily follow every jump.
Instead, use thresholds.
For example:
Player inside vertical zone
→ Camera remains fixed

Player leaves zone
→ Camera follows
This reduces unnecessary camera movement.
Top-Down 2D Camera
A top-down game uses a different coordinate system.
For example:
X = horizontal
Z = vertical
Y = height
Place the camera above the world:
local position = Vector3.new(
    target.X,
    100,
    target.Z
)
Then orient it toward the gameplay position.
This produces a top-down view.
Top-Down Games and Perspective
Even when looking directly downward, perspective still exists.
Objects at different heights or depths can appear different sizes.
If your game is designed on a flat plane, this may be barely noticeable.
However, it becomes more obvious if objects have large height differences.
Isometric-Style 2D Games
An isometric-style game can use a diagonal camera.
For example:
local offset = Vector3.new(
    70,
    70,
    70
)

local position = target + offset

camera.CFrame = CFrame.lookAt(
    position,
    target
)
This creates an isometric-like view.
Again, this is not a true orthographic camera.
It is a controlled perspective camera that produces a similar style.
Designing Isometric Levels
An isometric-style game often works best when the world follows a consistent grid.
You can design:
- Tiles
- Buildings
- Roads
- Objects
- Characters
around the camera’s viewing direction.
This consistency makes the perspective appear intentional.
2D Camera and World-Space Objects
A world-space 2D game can still use:
- Parts
- MeshParts
- Textures
- Lighting
- Particle effects
- Shadows
- Physics
This is one reason developers may prefer a 2D world-space architecture instead of making the entire game from GUI objects.
2D Camera vs. ScreenGui
ScreenGui renders UI directly on the player’s screen.
It is ideal for:
- Menus
- HUDs
- Buttons
- Inventory
- Health bars
- Score
- Maps
Roblox’s UI documentation describes ScreenGui and other on-screen containers as the system for graphical interface elements displayed to players.
World-space 2D games are different.
They use the 3D world as the gameplay surface.
When Screen-Space 2D Is Better
If your game is essentially a digital board or card interface, you may not need a custom world camera.
You can build the experience primarily with GUI objects.
This can simplify:
- Resolution scaling
- Button placement
- Menus
- Interface animations
- Screen-space positioning
But it does not provide the same world-space physics and 3D interaction.
Aspect Ratio Problems
A 2D game must handle different aspect ratios.
Imagine a level designed for 1920×1080.
A player might use:
- 2560×1440
- 1366×768
- 1280×720
- A tablet
- A phone
The visible region can change.
Roblox’s Camera ViewportSize is related to the device safe area, while the actual rendering area can have additional considerations on devices with display cutouts.
Therefore, don’t build your camera around one fixed pixel resolution.
Testing With Device Emulator
Studio provides a Device Emulator for checking how the game appears on different devices.
Use it regularly.
Check:
- Camera framing
- Player position
- UI
- Buttons
- Level edges
- Important objects
- Text
FieldOfViewMode
Roblox provides different field-of-view modes.
The available modes include:
- Vertical
- Diagonal
- MaxAxis
These determine which FOV characteristic remains invariant as the viewport changes.
This can be important when trying to keep your 2D game’s framing predictable across different screen shapes.
Supporting Wide Screens
A very wide screen can reveal more horizontal world space.
This may be acceptable in an exploration game.
But it could create an unfair advantage in a competitive platformer.
In such cases, you may want to design around a fixed gameplay region.
Supporting Narrow Screens
A narrow screen shows less of the level.
This can make platforming more difficult if hazards appear suddenly outside the camera.
Design levels with the smallest expected display area in mind.
Camera Safe Zones
A useful design technique is to define a safe gameplay rectangle.
Keep important objects within that area.
For example:
+-------------------------+
|                         |
|   SAFE GAMEPLAY AREA    |
|                         |
+-------------------------+
This makes your game more resilient across screen sizes.
Camera Zoom Systems
You can create your own zoom system.
For example:
local zoomDistance = 100
Change the distance based on player input.
Or change the FOV.
However, remember that changing FOV changes the perspective appearance.
If your goal is a consistent 2D presentation, limit zoom levels rather than allowing unrestricted zoom.
Fixed Zoom Levels
For example:
Zoom Level 1 = 80 studs
Zoom Level 2 = 100 studs
Zoom Level 3 = 125 studs
The exact values depend on your world.
This creates predictable gameplay.
Camera Transitions
When entering a new area, smoothly transition the camera.
You can use CFrame interpolation.
For example:
local alpha = 0.1

camera.CFrame = camera.CFrame:Lerp(
    destinationCFrame,
    alpha
)
The CFrame API supports this type of interpolation.
Camera Cutscenes
A Scriptable camera can also be used for cutscenes.
You can temporarily move it to a different position.
After the cutscene, restore the gameplay camera.
This allows a 2D game to include:
- Story scenes
- Boss introductions
- Victory sequences
- Area transitions
- Dialogue scenes
Camera Shake
Keep camera shake subtle.
A large rotation can break the 2D presentation.
A small position offset is usually less disruptive.
Handling Player Respawns
When the player respawns, the character reference may change.
Your camera controller should reacquire the new character.
Do not assume the original character remains available.
A robust controller should handle:
Player joins
↓
Character spawns
↓
Camera follows
↓
Character dies
↓
Character respawns
↓
Camera follows new character
Performance Considerations
Camera code can run every rendered frame.
Keep it efficient.
Avoid unnecessary loops.
Cache objects when possible.
Use render-step binding appropriately for camera updates.
The camera should not become a source of unnecessary computation.
Recommended Camera Controller Features
A production-quality 2D camera may include:
- Scriptable control
- Target tracking
- Horizontal limits
- Vertical limits
- Dead zones
- Smooth movement
- Zoom
- Screen shake
- Look-ahead
- Respawn handling
- Cutscene mode
- Aspect-ratio handling
You do not need every feature.
Start simple.
Add features only when the game requires them.
A Practical Development Order
Build the camera in this order:
Stage 1
Create a fixed camera.
Stage 2
Lock the player to the gameplay plane.
Stage 3
Make the camera follow the player.
Stage 4
Add boundaries.
Stage 5
Add smoothing.
Stage 6
Add dead zones.
Stage 7
Add zoom.
Stage 8
Add device testing.
Stage 9
Add special camera effects.
This prevents you from debugging several camera systems simultaneously.
Troubleshooting Guide
The camera does not stay where I put it
Set CameraType to Scriptable.
The camera follows Roblox’s normal behavior
The default camera system may still be active because the camera is not Scriptable.
I cannot find an orthographic setting
The current standard Camera API does not expose one.
Objects still change size with distance
You are still using perspective projection.
My camera moves too much
Reduce tracking sensitivity or add a dead zone.
The camera feels delayed
Reduce smoothing.
The camera shows outside the level
Add camera boundaries.
Mobile framing is different
Test with Device Emulator and account for aspect ratio differences.
Lighting looks inconsistent
Update Camera.Focus when using Scriptable camera control.
My top-down camera rotates unexpectedly
Use a fixed CFrame and do not allow the default camera system to modify it.
Frequently Asked Questions
How do I set up an orthographic camera in Roblox Studio?
Roblox’s current standard Camera API does not provide a native orthographic projection switch. Instead, use a Scriptable camera with fixed orientation, controlled position, and carefully chosen FOV.
Is this a true orthographic camera?
No. It is an orthographic-style camera setup using Roblox’s perspective camera.
Does Scriptable change the projection?
No. It gives your code control over camera behavior.
What is the best FOV for a 2D game?
There is no universal value. Choose a value that provides the desired framing and minimizes unwanted perspective while preserving comfortable gameplay.
Can I make a side-scrolling platformer?
Yes.
Can I make a top-down game?
Yes.
Can I make an isometric game?
Yes.
Can I stop the player moving into depth?
Yes. Your character controller can constrain movement to a single gameplay plane.
Can I create parallax?
Yes. Use different depth layers and controlled camera movement, although remember that the underlying projection remains perspective.
Can I use Roblox physics?
Yes. A world-space 2D game can still use the Roblox physics system, provided you constrain gameplay appropriately.
Can I use GUI instead?
Yes. If your game is fundamentally screen-based rather than world-based, Roblox’s GUI system may be more appropriate.
Why should I use Camera.Focus?
Focus tells Roblox which region of the world should receive priority for certain graphical processing when using a Scriptable camera.
How do I make the camera follow the player?
Read the player’s position and update the camera CFrame during the render step.
How do I stop the camera at level boundaries?
Clamp the target camera position using minimum and maximum coordinates.
How do I make camera movement smoother?
Use CFrame interpolation or a tween.
Should I test on mobile?
Yes. Different aspect ratios can substantially change what the player sees. Studio’s Device Emulator can help test different device configurations.
Can a Roblox 2D game still use 3D objects?
Yes. A 2D presentation does not necessarily mean that all assets must be flat images.
Can I use 3D characters in a 2D game?
Yes. A fixed camera can display 3D characters from a single direction.
Can I create a pixel-art game?
Yes. You can combine 2D textures, world-space geometry, and a fixed camera to create a pixel-art-inspired experience.
Conclusion
Creating an orthographic-style camera for a 2D Roblox game requires understanding an important limitation of the current Roblox camera system.
There is no standard OrthographicSize property or simple native orthographic projection switch exposed by the current Camera API.
Instead, developers can create a custom camera system using CameraType.Scriptable, CFrame, CFrame.lookAt(), controlled field of view, camera distance, camera boundaries, and custom tracking logic.
For a side-scrolling game, follow the player’s horizontal position while keeping depth fixed.
For a top-down game, position the camera above the gameplay plane.
For an isometric-style game, use a fixed diagonal orientation.
For screen-based games, consider whether a GUI architecture is more suitable.
The most important principle is to treat the camera as part of the game’s design rather than simply as a technical component.
A successful 2D camera should make the game predictable, readable, responsive, and consistent across different screen sizes.
Start with the simplest possible camera, verify the gameplay plane, establish camera boundaries, then add smoothing, dead zones, zoom, look-ahead, and other effects as necessary.
Although this approach does not turn Roblox’s perspective renderer into a mathematically true orthographic renderer, it can provide the controlled 2D presentation needed for a wide range of Roblox games.