
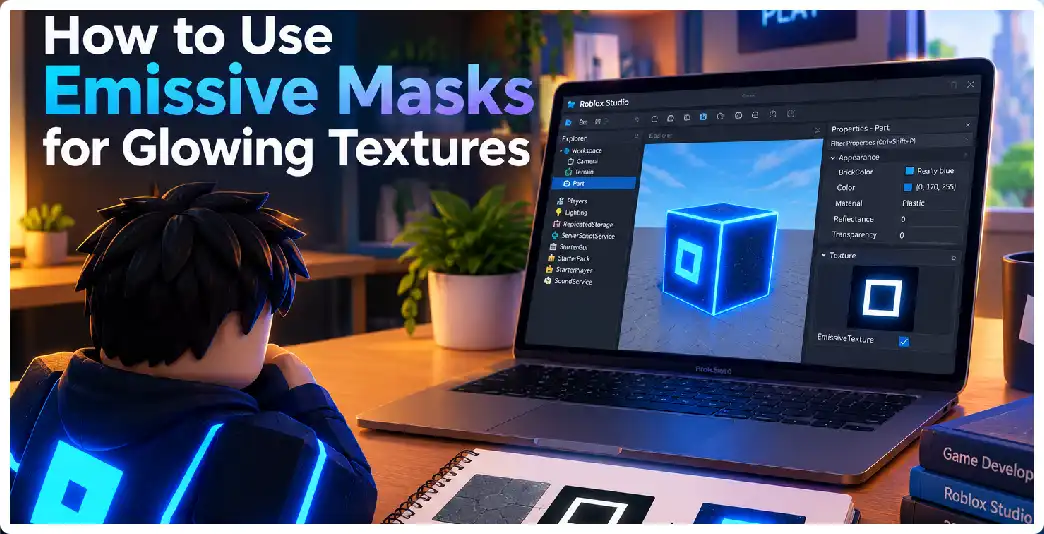
Glowing materials are a major part of modern game art. They can communicate information, establish atmosphere, guide players through environments, and create visual identity.
In Roblox Studio, emissive masks provide a particularly useful method for adding controlled glowing regions to textured 3D assets.
Instead of treating an entire object as a glowing surface, an emissive mask lets the artist describe the emissive distribution across the model.
That distinction is important.
A spaceship should not necessarily glow everywhere.
A robot should not necessarily have every surface emitting energy.
A futuristic building may contain thousands of individual surfaces, but only selected signs, windows, indicators, and architectural strips may need to glow.
An emissive mask gives the creator a texture-based way to define these regions.
This advanced guide explains the complete workflow, from UV preparation and grayscale mask design to SurfaceAppearance configuration, PBR integration, bloom, visual hierarchy, optimization, troubleshooting, and advanced material design.

Understanding the Rendering Concept
Before working with emissive masks, it is useful to understand the basic rendering concept.
A conventional material primarily describes how a surface responds to its environment.
The surface may reflect light, absorb light, scatter light, or appear rough or smooth.
An emissive component introduces another idea: the surface contributes brightness independently of ordinary reflected illumination.
This makes emission useful for objects that appear internally illuminated.
Examples include:
- Digital displays
- Neon signs
- Energy cells
- Computer interfaces
- Sci-fi panels
- Magical runes
- Glowing crystals
- Character eyes
- Vehicle lights
Roblox exposes emissive control through SurfaceAppearance.
The Role of SurfaceAppearance
SurfaceAppearance provides advanced texture inputs for MeshParts.
Its material system can incorporate:
- ColorMap
- NormalMap
- MetalnessMap
- RoughnessMap
- EmissiveMaskContent
- EmissiveStrength
- EmissiveTint
These properties allow artists to separate different aspects of the material.
The color map describes surface color.
The normal map modifies the apparent small-scale geometry.
The metalness map controls metallic behavior.
The roughness map controls surface reflection characteristics.
The emissive mask identifies where emissive contribution occurs.
The emissive strength determines how strongly it contributes.
The emissive tint controls the emissive color.
This separation is the foundation of a flexible PBR workflow.
Why the Mask Is Grayscale
An emissive mask is designed to communicate intensity rather than full RGB color.
That is why black, white, and gray are so important.
Consider a pixel in the mask.
A black pixel tells the renderer that the corresponding surface region should receive no emissive contribution from the mask.
A white pixel represents the strongest mask value.
A gray pixel lies between those extremes.
This makes the mask effectively a map of emissive intensity.
The current texture specification identifies emissive masks as single-channel grayscale maps.
The Mathematical Idea Behind the Mask
You can think of the emissive mask as a multiplier.
Conceptually:
Final Emissive Contribution
=
Mask Value × Emissive Strength × Emissive Color
The actual rendering pipeline contains additional factors and interactions, so this is a simplified conceptual model rather than a complete description of Roblox’s renderer.
But it is extremely useful for understanding the workflow.
If the mask value is zero, the emissive contribution from that region is zero.
If the mask value increases, the contribution increases.
If the emissive strength increases, the contribution becomes stronger.
This is why changing the mask and changing emissive strength produce different types of control.
Mask Versus Strength
This distinction is fundamental.
Suppose you have a control panel.
You want the buttons to glow.
You could increase emissive strength, but that doesn’t decide which pixels are buttons.
The mask defines the spatial distribution.
Strength defines the overall intensity multiplier.
Therefore:
Mask = where
Strength = how strong
Tint = what color
This mental model makes material editing much easier.
Preparing the UVs
The entire emissive-mask workflow depends on correct texture coordinates.
Your mesh needs UV information that tells Roblox how a two-dimensional texture maps onto the three-dimensional surface.
Roblox’s SurfaceAppearance workflow is designed around UV-mapped MeshParts. Ordinary Parts do not have the same UV-based surface-texture capability.
Therefore, UV preparation should be treated as a foundational step rather than something you fix after texturing.
UV Organization for Emissive Assets
When preparing a model, consider which regions will glow.
If a small critical display occupies only a tiny portion of the UV atlas, it may be difficult to paint detailed emissive information there.
Important glowing elements should receive appropriate UV space.
This is especially important for:
- Logos
- Text
- Control panels
- Character eyes
- Weapon blades
- Vehicle lights
- Interactive indicators
Good UV planning makes later texturing easier.
Creating the Base Texture
Start with the normal color texture.
This should contain the material’s ordinary visual information.
For example, a sci-fi helmet could have:
- Dark painted metal
- Scratches
- Dust
- Warning labels
- Rubber components
- Glass
- Glowing indicators
Do not make the color texture unnecessarily dependent on the emissive mask.
Treat the color map as the surface’s primary appearance.
Creating the Emissive Pass
Now duplicate the UV layout or use the same texture coordinates to create a separate emissive map.
Fill the entire image with black.
This establishes a zero-emission baseline.
Now paint the regions that should glow.
White can represent the strongest regions.
Gray can represent secondary regions.
This process resembles creating an illumination pass in a traditional game-art pipeline.
Designing Intensity Hierarchy
Avoid thinking only in terms of “glow” and “no glow.”
Professional material design often benefits from several intensity levels.
For example:
0%    Black
15%   Very dark gray
35%   Dark gray
50%   Medium gray
75%   Light gray
100%  White
These values are conceptual rather than mandatory settings.
The point is to create a hierarchy.
A futuristic dashboard could have:
- 15% for decorative traces
- 35% for inactive indicators
- 50% for active buttons
- 75% for important displays
- 100% for emergency warnings
This creates much stronger visual communication.
Using EmissiveTint Strategically
Emissive tint should support the identity of the object.
For a medical device, cool cyan may suggest technology.
For an industrial warning system, orange or red may communicate danger.
For a fantasy artifact, purple or blue may communicate magic.
For an alien environment, unusual combinations can create a distinctive atmosphere.
However, color alone does not create the material.
The intensity distribution in the emissive mask remains important.
Combining the Emissive Mask With the ColorMap
The emissive mask identifies where the emissive contribution occurs, while the color map supplies the base surface appearance.
The final visual result therefore depends on their relationship.
A bright color texture can already look luminous.
Adding strong emission to that same area can push it toward clipping.
For this reason, don’t judge emissive strength in isolation.
Evaluate the entire material.
Why Excessive Emission Can Look Bad
Increasing emissive strength can eventually make detailed texture information disappear.
A panel containing:
- Text
- Scratches
- Buttons
- Borders
may look detailed at moderate intensity.
At excessive intensity, all of those details may become visually compressed into a bright area.
The result can appear flat.
Therefore, strong emission should be reserved for surfaces that genuinely need to dominate attention.
Emission and PBR Surface Detail
One of the most powerful approaches is combining emission with other PBR information.
Imagine a futuristic reactor.
The outer casing might use:
- Metalness for metal behavior
- Roughness for surface finish
- Normal mapping for panel detail
- ColorMap for paint
- Emissive mask for energy lines
This creates a material where different regions behave differently.
The reactor casing can remain dark and reflective while the energy core glows.
Emission and Metalness
Metalness does not mean “brightness.”
It defines whether a surface behaves like a metal or non-metal in the PBR material model.
Emission is separate.
Therefore, a metallic object can contain emissive regions.
A robot’s metal armor can have glowing LED strips.
A spaceship’s metal hull can have illuminated markings.
A sword’s metal handle can surround an emissive energy blade.
This separation is one of the major advantages of using multiple texture maps.
Emission and Roughness
Roughness describes how concentrated or dispersed reflections appear.
A glowing screen might be smooth.
A surrounding metal surface might be rough.
A worn industrial warning panel might have intermediate roughness.
The emissive mask can coexist with all of these material properties.
This makes it possible to create objects that are both physically detailed and visually stylized.
Emission and Normal Mapping
Normal maps affect how lighting interacts with apparent small-scale surface details.
They do not physically add geometry.
A control panel can therefore use a normal map to create the appearance of grooves and buttons while the emissive mask illuminates selected controls.
This creates a useful division of responsibility:
Normal map = surface detail
Emissive mask = illumination distribution
Building a Professional Sci-Fi Panel
Consider a spaceship control panel.
The base material is dark metal.
The panel contains several screens.
Each screen has its own colored graphics.
Small buttons surround the screens.
A professional texture setup could use:
- ColorMap for panel artwork
- MetalnessMap for metal regions
- RoughnessMap for surface variation
- NormalMap for physical detail
- EmissiveMask for screens and selected buttons
The main display could use white in the emissive mask.
Secondary buttons could use gray.
Inactive controls could remain black.
This makes the panel appear functional rather than simply decorative.

Creating Glowing Text
Glowing text is a particularly common application.
The text can be part of the color texture.
The emissive mask can place white pixels exactly where the letters are located.
The background remains black.
If the sign uses multiple colors, the emissive tint or underlying texture design can help create the intended appearance.
This technique can be used for:
- Shop signs
- Building numbers
- Mission indicators
- Game objectives
- Advertisements
- Warning labels
- Sci-fi signage
Creating Animated-Looking Displays
A static emissive mask can make a screen look illuminated, but animation is a separate problem.
If the game needs a screen to change, flicker, scroll, pulse, or display dynamic information, you may need a runtime visual system in addition to the static material setup.
Roblox provides dynamic content-related workflows, but some SurfaceAppearance properties are not intended to be freely changed through ordinary runtime scripting because of processing costs.
Therefore, design the material system around what needs to be static and what genuinely needs to change.
Creating Energy Effects
For an energy core, the mask can use gradients.
Instead of a flat white circle, create:
Outer area = black
Transition = dark gray
Inner glow = gray
Core = white
This gives the emissive contribution a center-weighted appearance.
You can then add bloom to create a broader halo.
Using BloomEffect
BloomEffect is a post-processing effect designed to simulate the visual response to very bright areas.
It can cause bright portions of the image to appear to glow outward.
This is particularly useful when you want an emissive texture to feel more like light.
However, bloom should be considered a scene-level visual effect rather than a replacement for the emissive mask.
The mask determines where the object is emissive.
Bloom determines how bright rendered regions visually spread into the surrounding image.
Bloom and Emissive Strength Are Not the Same
This is a common point of confusion.
Increasing emissive strength does not simply equal increasing bloom.
You can have:
High emission + low bloom
or:
Moderate emission + stronger bloom
or:
Low emission + no bloom
These combinations produce different visual results.
For a polished game, tune both independently.
Using Glow to Guide Players
Emission is not just decorative.
It can communicate gameplay information.
For example:
- Green = usable
- Blue = interactive
- Yellow = warning
- Red = danger
These conventions are not mandatory, but consistent visual language can help players interpret an environment.
A glowing doorway can indicate an objective.
A glowing button can show interaction.
A glowing power source can tell players what to activate.
The material therefore becomes part of the game’s user interface.
Emissive Masks in Horror Games
Horror environments benefit from controlled contrast.
Imagine a dark abandoned laboratory.
Most surfaces are non-emissive.
A few emergency indicators glow faintly.
A strange symbol emits a subtle purple light.
A distant pair of eyes is brighter.
This creates visual storytelling.
If everything glows equally, the atmosphere becomes less effective.
The emissive mask gives the artist precise control over this hierarchy.
Emissive Masks in Fantasy Games
Fantasy environments can use similar techniques.
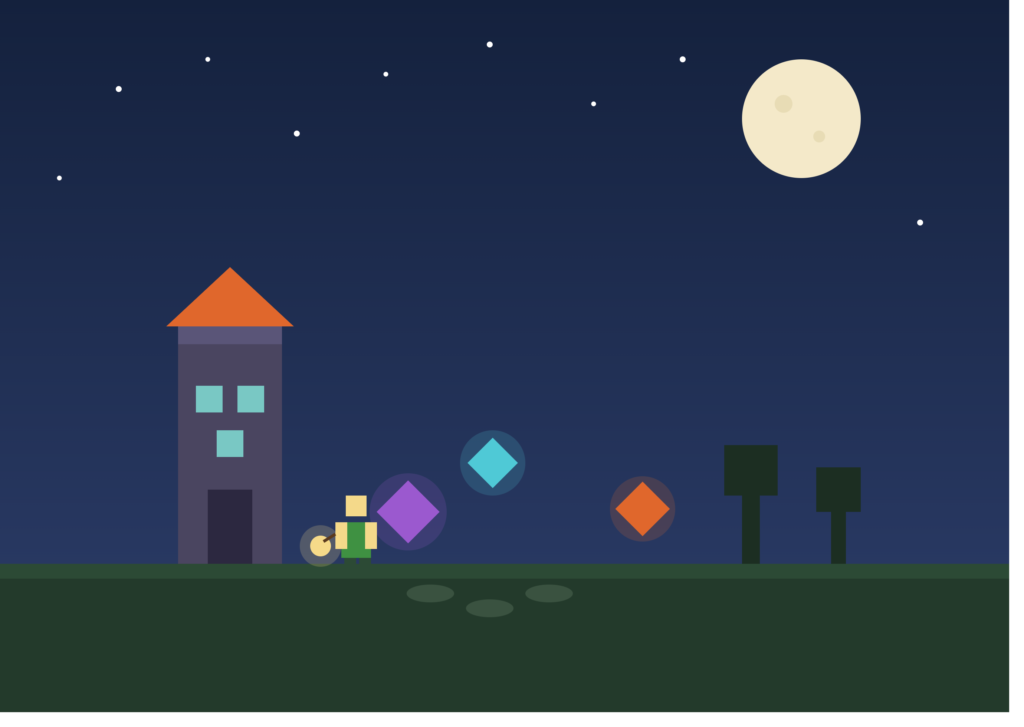
A magical temple might contain:
- Glowing runes
- Enchanted stones
- Magic circles
- Crystal formations
- Ancient symbols
Use different mask intensities to create layers.
A faint rune can use gray.
The central magical symbol can use white.
The surrounding stone remains black.
Emissive Masks in Cyberpunk Games
Cyberpunk environments often contain a large number of illuminated surfaces.
This makes mask organization especially important.
A building may contain:
- Neon signs
- Window strips
- Advertising screens
- Street markers
- Vehicle lights
- Holographic displays
If all of these are equally bright, the scene can become visually chaotic.
Use intensity levels to decide what dominates.
Texture Resolution and UV Efficiency
Roblox currently supports surface texture maps within a maximum 1024×1024 pixel texture space.
That does not mean every object needs a 1024×1024 texture.
Texture resolution should reflect:
- Object size
- Camera distance
- Importance
- Amount of visible detail
- Number of unique materials
A hero object seen close to the player may justify more texture detail.
A tiny background prop usually does not.
Reusing Emissive Masks
If several assets share the same UV and material structure, reusable texture workflows can reduce unnecessary duplication.
For example, a modular sci-fi environment may use similar panel designs across many assets.
A consistent material structure can make content management easier.
SurfaceAppearance objects can also be organized and reused as packages in appropriate workflows.
Common Professional Workflow
A strong production pipeline can look like this:
Modeling
Create clean geometry.
UV Mapping
Create consistent UVs.
Base Texturing
Build the color map.
Material Maps
Create normal, roughness, and metalness maps where required.
Emissive Design
Create the grayscale emissive mask.
Roblox Integration
Add SurfaceAppearance.
Material Tuning
Adjust strength and tint.
Lighting
Tune the environment.
Post-Processing
Add bloom if appropriate.
Optimization
Reduce unnecessary texture and visual complexity.
Testing
Test the asset from different distances and lighting conditions.
Diagnosing UV Problems
Suppose the left eye of a character is glowing on the chest.
That is almost certainly not an emissive-strength problem.
Increasing or decreasing strength won’t fix the location.
Instead, investigate:
- UV coordinates
- Texture orientation
- Texture alignment
- Mesh export
- Mask alignment
The mask follows the UV mapping.
If the UV mapping is wrong, the mask cannot magically know where you intended the eye to be.
Diagnosing Overexposure
If the glowing section looks completely white, reduce emissive strength.
Also inspect the color map.
A bright base color plus strong emission can produce excessive brightness.
Remember that emissive contribution can be clamped when it exceeds the supported dynamic range.
Diagnosing Weak Emission
If the mask appears correct but the glow is barely visible:
- Check the mask.
- Check emissive strength.
- Check emissive tint.
- Check the surrounding lighting.
- Check whether the asset is visible from enough distance.
- Consider bloom if you need a halo.
Do not immediately increase the value to an extreme level.
Diagnosing a Blurry Glow
If the object itself is sharp but the surrounding halo is extremely broad, inspect your post-processing settings.
Bloom can make bright objects appear to spread light visually.
If the effect is too strong, reduce the post-processing intensity or adjust the relevant parameters.
Diagnosing Inconsistent Results
SurfaceAppearance-based visuals can vary depending on graphics quality settings.
Therefore, an asset should be evaluated under the quality levels relevant to your game’s audience.
Do not optimize exclusively for a high-end development machine.
Mobile and Lower-End Considerations
Roblox experiences can be played on a wide variety of hardware.
When creating a visually rich game, don’t assume that every player will see the same rendering conditions.
Keep your material complexity appropriate for the experience.
Avoid relying on extremely aggressive post-processing to make an object readable.
The object should still communicate its basic visual purpose without excessive bloom.
Creating a Reusable Emissive Mask Template
For large projects, create a standardized template.
For example:
BLACK = no emission
DARK GRAY = decorative
GRAY = normal active
LIGHT GRAY = important
WHITE = critical
Use this convention consistently.
It makes future assets easier to create and maintain.
Example: Futuristic Helmet
A helmet can use:
ColorMap
Dark gray armor with scratches and labels.
MetalnessMap
High values for metallic sections.
RoughnessMap
Different values for polished and worn areas.
NormalMap
Panel lines and surface details.
EmissiveMask
White for eyes, gray for armor strips, black for the rest.
EmissiveTint
Cyan.
The result is a helmet with a dark mechanical appearance and controlled cyan illumination.
Example: Energy Sword
Color map:
Metallic handle and bright blade design.
Metalness:
Metal handle.
Roughness:
Different values for handle and blade.
Normal:
Small mechanical details.
Emissive mask:
Blade = white.
Handle = black.
Decorative energy lines = gray.
Emissive tint:
Blue.
Bloom:
Moderate.
This creates a strong focal point.
Example: Magical Artifact
ColorMap:
Stone and crystal textures.
NormalMap:
Engraved symbols.
Roughness:
Matte stone with smoother crystal.
EmissiveMask:
Runes = gray.
Crystal core = white.
EmissiveTint:
Purple.
Bloom:
Subtle.
The result can look magical without turning the entire artifact into a bright object.
Example: Industrial Warning Panel
ColorMap:
Dark metal and yellow warning markings.
EmissiveMask:
Warning indicator = white.
Other markings = black.
EmissiveTint:
Red.
The contrast makes the warning light stand out.
Ten Rules for Better Emissive Materials
Rule 1: Plan the UVs First
Do not paint a detailed mask before confirming the UV layout.
Rule 2: Start With Black
Begin with no emission and add only the areas you need.
Rule 3: Use Gray
Gray values create useful intensity variation.
Rule 4: Reserve White
White is useful for your strongest emissive areas.
Rule 5: Control Strength Carefully
More brightness does not automatically mean better visuals.
Rule 6: Use Tint Deliberately
Color should support the material’s purpose.
Rule 7: Combine PBR Maps
Emission becomes more convincing when surrounded by detailed material information.
Rule 8: Use Bloom Carefully
Bloom should enhance the material rather than hide it.
Rule 9: Test Different Lighting
Materials can look dramatically different depending on the environment.
Rule 10: Optimize
Only use detailed emission where it contributes meaningfully to the scene.
Frequently Asked Questions
What is an emissive mask used for?
It controls which portions of a textured surface receive emissive contribution.
What does black mean on an emissive mask?
Black represents no emissive contribution from that part of the mask.
What does white mean?
White represents the strongest mask value.
Why use gray?
Gray allows intermediate emissive intensity.
Does the mask determine the color?
The mask primarily determines emissive distribution. EmissiveTint can be used to influence the emissive color.
What does EmissiveStrength do?
It controls the strength of the emissive contribution.
Why should I avoid extremely high strength values?
Very high emissive contribution can exceed the available dynamic range and cause bright areas to clip toward white.
Does an emissive mask replace a color map?
No. They serve different purposes.
Can I use emissive masks with normal maps?
Yes. They can be part of the same PBR material workflow.
Can I use emissive masks with metalness and roughness?
Yes. Each map controls a different aspect of the surface.
Why does my mask appear in the wrong location?
Check the UV mapping and confirm that the mask matches the mesh’s UV layout.
Why does the whole model glow?
The mask may contain too much white or gray.
Why does nothing glow?
Check the mask assignment, SurfaceAppearance, emissive strength, and texture content.
Does Roblox require a special emissive texture format?
The current texture specifications describe emissive masks as single-channel grayscale maps.
Can I use an emissive mask for a neon sign?
Yes.
Can I use it for glowing character eyes?
Yes, where the supported character or accessory workflow allows emissive materials.
Can I use it for a weapon?
Yes. It is particularly useful for energy blades, glowing cores, and illuminated details.
Can I use Bloom without an emissive mask?
Bloom is a separate post-processing effect. It can be used with other bright visual elements, but an emissive mask gives you precise control over which parts of a surface are emissive.
Does Bloom create actual light?
Bloom is a post-processing visual effect. It creates the appearance of light spreading from bright image regions rather than replacing the need for actual scene light sources.
Should glowing objects illuminate nearby objects?
Do not assume that an emissive surface automatically provides the same result as a dedicated point, spot, or surface light. If the gameplay or visual design requires actual illumination of nearby surfaces, consider appropriate lighting objects as part of the scene.
Can emissive masks be animated?
Static emissive masks are straightforward. Dynamic visual effects may require additional runtime systems and should be designed according to Roblox’s supported content and scripting workflows.
Final Thoughts
Emissive masks are much more than a way to make an object look bright.
They are a method of controlling the visual distribution of energy across a material.
A successful emissive workflow starts with good UVs, continues with a carefully designed grayscale mask, and then combines that mask with emissive strength, tint, and other PBR properties.
The most effective glowing assets are usually not the ones with the highest brightness.
They are the ones where brightness is used selectively.
A dark spaceship with carefully illuminated controls can look more convincing than a completely glowing spaceship.
A fantasy crystal with a bright center and subtle edges can look more interesting than a uniformly white crystal.
A cyberpunk building with a handful of powerful signs can create stronger visual direction than a building where every window glows equally.
The key is contrast, hierarchy, and control.
Use the emissive mask to decide where the material glows.
Use emissive strength to decide how strongly it glows.
Use emissive tint to help determine what color the emission appears.
Use PBR maps to define the physical and visual characteristics of the surrounding material.
Use Bloom when you want a broader camera-based glow.
Finally, test the result under different lighting and graphics conditions.
Once these principles become familiar, emissive masks can become an important part of your Roblox Studio environment-art workflow, allowing you to create everything from subtle illuminated interfaces to dramatic futuristic energy systems and magical glowing objects.